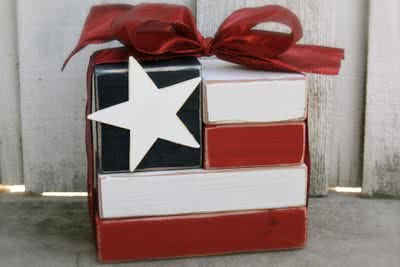
Anyway, this is so easy:
-You will need a 2×4 piece of wood, which is about $2. If you take it to the back of the store, they usually have a saw and will cut it for free. You need 2 pieces that are 7″ long and 4 pieces that are 3.5″ long.
-Paint one 7″ piece and one 3.5″ piece red.
-Paint one 7″ piece and one 3.5″ piece white.
-Paint two 3.5″ pieces blue.
-Sand down the edges if you like that look.
-Pick up a little wooden star at the craft store . . . or you could even paint one on if you feel like it! Paint it white and glue it on one of the navy blue wood pieces.
-Stack up your flag- use the 7″ pieces on the bottom and alternate red and white stripes. I know that the flag has a red stripe at the top, but I didn’t like the way that it looked with my red ribbon. So, my flag is not accurate . . . that, and it’s missing about 49 stars and 9 stripes. Ha ha!
-The two navy blue pieces stand up instead of laying down like the stripes and put one block in front of the other.
-Take a thick ribbon and tie it around the entire flag, tying at the top. I used a thick wire-edged ribbon and it worked great holding it all together.
That’s it! Happy 4th of July! 🙂


Thanks for sharing,
Kristina
(visiting from voiceBoks)
Have a great week. Best wishes,
Cindi
A mommy's life...with a touch of YELLOW
Your fabulous flag block tutorial was the perfect match for this week's features!!
Best, Jenn