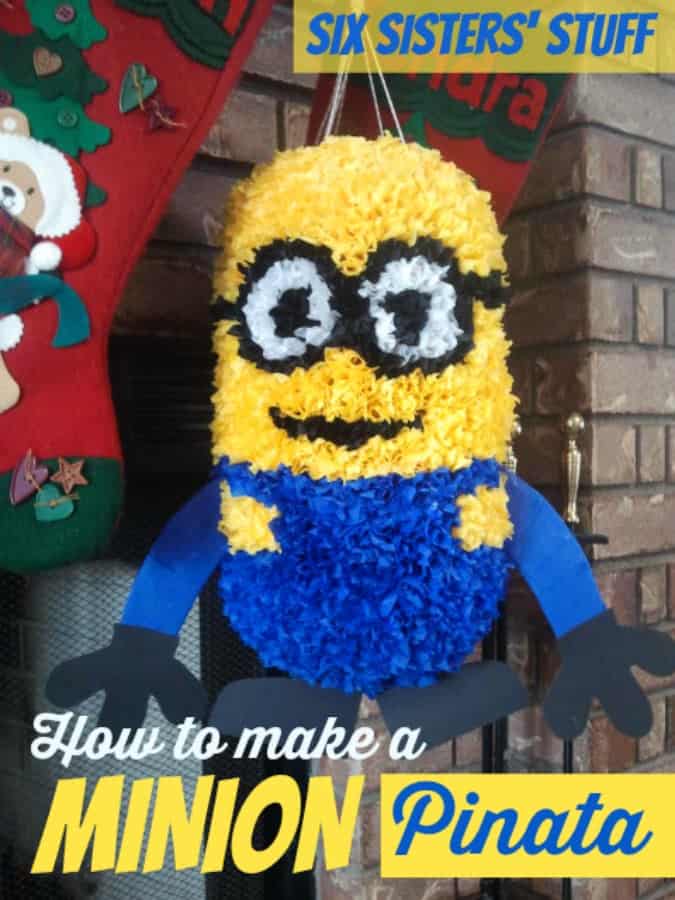
Our all time favorite Christmas memory growing up was breaking open a pinata. Our mom would make one every year. That tradition was passed down from our Grandma Char. As little girls we would often help decorate it with crepe paper. Our love of pinatas has grown. We now have them for birthday parties, family reunions, and other family get togethers. Our kids love to see what pinata Grandma will come up with every Christmas. She already knows that next Christmas will be Sponge Bob!
How To Make A Minion Pinata
Items needed:
Rolls of crepe paper in the following colors:
White
Blue
Yellow
White
1 sheet of black paper or black card stock (for hands and feet)
4 ounces of Elmer’s glue
scissors
cardboard for arms and legs (I used a cut up cereal box)
2 9 inch balloons
10 small balloons (I used water bomb balloons)
12 wooden skewers
6 feet of thick string
duct tape
newspaper cut into 2 x 8 inch strips
hot glue gun with glue stick
Directions:
Begin by blowing up your balloons. I put the 2 knotted ends of the 9 inch balloons together. Then attach them with the wooden skewers. Just use duct tape to hold it all together. Fill in the gaps with the smaller balloons. I also stuffed newspaper around the small balloons to get the shape of a minion and to fill all gaps.

Then make a flour and water mixture with 1 cup flour to 1 cup water. The water and flour ratio is about equal. Cut the paper into strips and dip them in the flour mixture. Gently wipe off the excess batter and stick the strip of paper onto the pinata. We balance the balloon on a mixing bowl while putting the paper strips on. Cover most of the pinata overlapping the paper strips. After it dries for about 6 hours or overnight you can flip it over and do the other side that was inside the mixing bowl. Be sure to leave a 3 inch opening in one end for putting in the candy.
You will want to do the above step a few times so that you can have a few hard layers that are overlapped. Between layers you can attach string so that it wraps around the bottom of the balloon with the string ends coming out of the top by the hole for the candy. Hold the string in place with little pieces of duct tape. Then just put another layer of newspaper strips dipped in the flour mixture right over the top. It makes it easier to have that in place for hanging it on a pole or stick. You can always just put some holes in the finished pinata to put your string through. Either way works great. After your layers are done and hardened you can pop the balloons inside and pull out all of the sticks, balloons and crunched up newspaper. You will have a hard shell. Then you can draw the face of your minion on your hard pinata shell. Just know that the shell could take a day or two because you need to allow for time for drying.
Now the fun begins. Cut the crepe paper into squares. Twist the end of each piece, dip the end in glue and stick it on the pinata. This is where you get the kids involved.
You may think that it will take a long time, but I would decorate while watching the news or if I had a few minute here or there. Before you know it, he starts taking shape…..so cute!! For the arms and feet I just free handed them on the cardboard, cut them out and covered them in crepe paper by wrapping it around until covered. The hands and feet can be black cardstock, poster board, or cardboard covered with black paper. For the limbs I parted the crepe paper enough to squirt in some hot glue and stuck in the arms and feet. We also added some little strands of hair on top of his head at the last minute. You’ll see that in the final pictures!
Let the party begin!!!
During the summer we hang the pinata from a rope and loop it over a branch so we can raise and lower it while the kids take a swing. During the winter we have grandpa hold it from a long broom stick or pole. The kids are blindfolded and each get a couple of good whacks! It’s so fun! Even the adults dive in for the candy! (Right Jared?) This poor Minion has seen better days!!
Here are a few of our pinatas from previous parties!
Be sure to check out our new Six Sisters’ Store where you can find all our favorite kitchen and baking supplies, plus our cookbooks!







Questions & Reviews