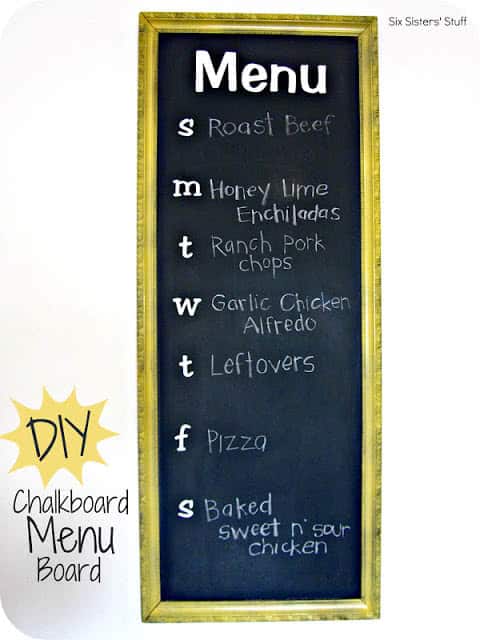
One of the most common phrases in our home is, “What’s for dinner?!” I thought this menu board might solve that problem mighty quick and add a little somethin’ to my kitchen!
Here is how to make your own:
I bought this frame at a thrift store for a few dollars. Isn’t she lovely?! 🙂 It measures about 1′ x 3′.
Step 1: Remove hanging hardware from the back and paint your frame. I didn’t sand my frame down because I didn’t want to mess up any of the detail along the edge, but you could do that first if you prefer.
I used a generic brand yellow spray paint that was closest to the color I was wanting. I sprayed 3 coats of paint on my frame to get really good coverage.
Step 2: Take the glass out of your frame and paint with chalkboard paint.
I used Krylon Chalkboard paint in black and did three coats on each side of the glass. I painted the back as well and then chose the best side to be the front of the menu board.
Step 3: Antique frame. I used black acrylic paint.
I spread some black acrylic paint on my frame, a few inches at a time, with a foam brush.
After just a few seconds, I rubbed off most of the black acrylic paint with a clean rag. Most of the remaining paint ends up in the cracks and crevasses to give the frame a more finished look.
Step 4: Cut out a piece of cardboard or foam backing to fit your frame. My original frame came with a really beat up cardboard backing, so I just bought a box and cut out the dimensions I needed. Reassemble frame with the chalkboard glass and the cardboard on back.
Step 5: Reattach hanging hardware. If this wasn’t included with your frame, you can find a huge variety at any hardware store.
Step 6: Apply vinyl. I don’t have any vinyl cutting equipment, so I ordered mine from craftcuts.com where you can order any font, size, color and letter(s) in vinyl that you want! It cost about $10 total for my vinyl and shipping! They included detailed instructions of how to apply your vinyl.
Step 7: Prime your chalkboard. Using the side of the chalk, rub chalk over the whole surface prior to the first use, this will prevent any ‘burned in’ images.
You’re done!








Questions & Reviews