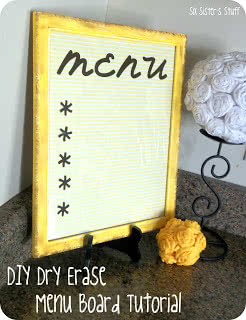
I love yellow right now! I’m slowing adding yellow to my kitchen. My friend Melissa had a Menu Board that she made and offered to teach me. Here is what you will need.
1. A Cheap 8X10 wood picture frame (got mine at the Dollar Store)
2. Paint of whatever color you want
3. Sandpaper (if your wood needs it)
4. Any paper you choose to use behind your white board (picture frame)
I first started with a plain brown frame. It was really rough around the edges so I sanded it up a bit.
Next I painted a coat of white paint and let it dry. Then I added a coat of bright yellow paint and let it dry. (I did 2 coats of yellow)
After the yellow dried I sanded all over the place so you could see some white coming through. Then I added a little brown on the outsides and middle to give it more of an antique look.
Make Your Menu: You can do this 2 ways. The first way is to use a Cricut. Cut out vinal and stick it on the inside of your glass. Or if you don’t have a cricut, you can print the word “Menu” and your “stars” out on your printer. Practice on a white piece of paper first then do it on the paper you want to use.
Last: Put it all together! I got a cute little stand at a craft store for $2 to hold my Menu board.
*Instead of Stars you can print out the Days of the week. My menu always gets switched around, that is why I did stars.
