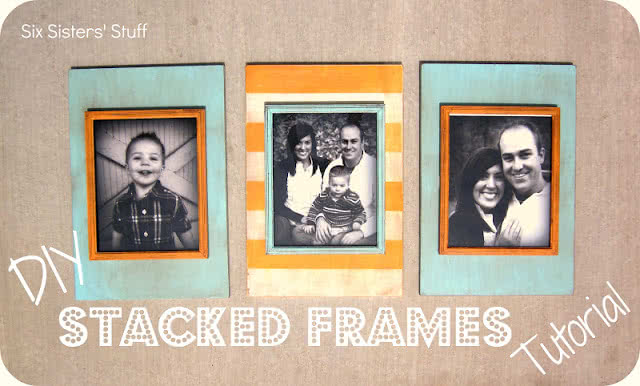
My poor living room has a lot of black in it. Black furniture (my husband thought they were manly, yet stylish couches), frames, shelves…..the list goes on. I finally decided it was time to get rid of my drab decor and lighten up the joint with some fresh pops of color!I have seen so many different stacked frames, but I loved this one by Positively Splendid because you could change out the picture rather than having it be permanently stuck to your frame!
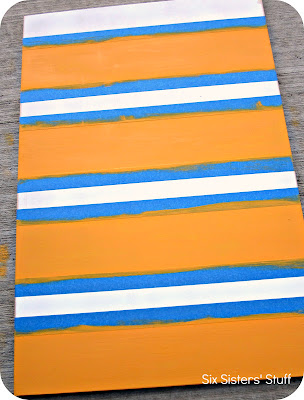
Step 3: Use painters tape to mark off stripes. I made small marks with a pencil every three inches to have wider stripes. You could make them any distance apart that you choose or do a whole different design altogether! I used two coats of Folk Art Acrylic Paint in Tangerine.
After my paint dried, I removed the painters tape. I sanded down the edges of my board to match the others.
Step 4: Apply gel stain. I found this little bottle at Hobby Lobby next to the acrylic paints. If you can’t find them, you could also use regular acrylic paint in the color of your choosing.
Here is how to apply it:
Using a foam paint brush, apply one swipe of gel stain to the frame or wood your are using. Only spread the gel stain on a few inches at a time, because if you do anymore it will dry too quickly.
Using a clean rag, quickly wipe away the gel stain after just a few seconds. It will leave stain in the cracks and divots, giving it a distressed look. Do this to all three of your frames.
Apply gel stain to your boards as well. They will absorb the stain quicker so it might look a little scary for a minute!
Step 5: After you have applied gel stain to all of your frames and boards, sand them down. I sanded the edges and fronts of each piece of wood. It gives it an antiqued look and gets rid of the brush marks from where you applied the stain. After you have sanded everything until it is to your liking, wipe the boards down with a clean cloth to remove all dust.
Step 6: Apply industrial strength Velcro.
Put a strip of Velcro on the top and bottom of each frame. I ended up having leftover Velcro, so I put it on all 4 sides to make it really secure, but two would hold just fine. I attached the “fuzzy” side of the Velcro to my frame, and the “scratchy” side to my board.
Put two strips of Velcro on your wood board so they will line up with the ones on your frame. Again, because I used four strips, I had to measure where to put all four strips of Velcro so they line up properly.
Make sure both sides of the Velcro line up properly, and apply Velcro to all frames and boards.
Step 7: Apply sawtooth hanger to the back of each board.
Step 8: Cut out a piece of cardboard or foam board the size of each frame. Place glass from the original frame down, then your picture and top with the foam/cardboard backing.
Step 9: Attach frames to coordinating boards and you’re done!
Now I just have to find a place to hang them!
Linking up here.


-Mel the Crafty Scientist
I am so sorry, but I am not sure the type of wood I used. I am not very handy and just bought some that was smooth and the thickness I was looking for. I ended up just buying the cheapest wood I could find that had a smooth finish. Sorry I am not more help!