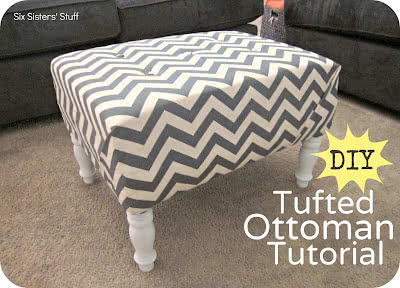
I have been looking high and low for an ottoman that would match some new gray furniture we got for our living room. The only problem is, they all cost way more than I am willing to pay! I decided to make my own using an old ottoman I found for $20!
Supplies:
– ottoman
– upholstery fabric (I used duck cloth)
– staple gun & staples
– button covering kit
– upholstery needle
– tape measure
– upholstery thread
– buttons
– upholstery fabric (I used duck cloth)
– staple gun & staples
– button covering kit
– upholstery needle
– tape measure
– upholstery thread
– buttons
Here is how:
Step 1: Find an ottoman that you are looking to recover. I have seen quite a few at garage sales, thrift stores and occasionally on clearance at stores like Ross or TJ Maxx.
Step 2: Remove all of the fabric from the ottoman. I didn’t realize how much work this would be! That fabric is quite secure with tons of staples.
I tried to remove the majority of the fabric and staples (don’t worry, I ripped out all those threads and fabric). I especially wanted to remove the staples so there would be room for new ones I would be using to attach my fabric. Don’t worry if it looks a little scary at this point, it will be covered in no time!
Step 3: Wipe down the ottoman with a rag for a clean surface to paint. If you like the color of the legs on your ottoman, you don’t need to worry about this step! I decided to use Krylon Flat White to paint the legs of my ottoman. I didn’t sand the legs prior to painting because they were clean and smooth so it was easy to cover. If yours are quite chipped and rough I would consider using a little sandpaper to smooth them out before painting. Be sure to cover any parts of the ottoman that you don’t want to be covered in paint (i.e. batting on the sides, springs underneath, etc.).
Looking better already!
Step 4: Drape fabric over the top of your ottoman making sure the pattern is going the direction you want. Your fabric should hang over enough to be able to be tucked underneath the ottoman and stapled. Trim the fabric to a length that will allow you to do so.
Step 5: Carefully turn your ottoman upside down and staple the fabric around the edges of the wood inside. Make sure your fabric is pulled really tight so it isn’t loose when you turn your ottoman right side up. Staple all of the sides and leave the corners unstapled.
Here is how to staple the corners:
Fold the unfinished edge of your fabric underneath the other fabric for a nice folded edge. Pull the fabric tightly against the ottoman leg. Staple down the fabric.
Do the same thing to the other side of the corner. Fold the fabric under, pull tightly against ottoman leg and staple in place. This will leave a flap of fabric at the corner of your ottoman.
Pull out the flap of fabric. Tuck the unfinished edges in so they won’t be exposed. Pull the fabric tightly and fold over the edge of your ottoman, just like you would when you are tucking in the corner of your bed sheets when making your bed. Staple the corner in place on the inside of the ottoman.
This is what it should look like after all of your corners are finished.
If you need to find a sturdy, inexpensive staple gun you can find this at WalMart for $10!
Step 6: Cover buttons using a button covering kit. You can find a button covering kit at any craft store near the sewing supplies. I found mine at Hobby Lobby for $3 and it includes everything you need (except for the fabric) to cover 5 buttons!
Step 7: Turn the ottoman right side up and mark with a pencil or washable marker where you want your buttons to be placed. Cut a long length of upholstery thread and tie to button. Thread both ends through an upholstery needle.
Push needle through from the front to the back. Pull tightly. On the backside of the ottoman use a button to thread through and secure your covered button in place.
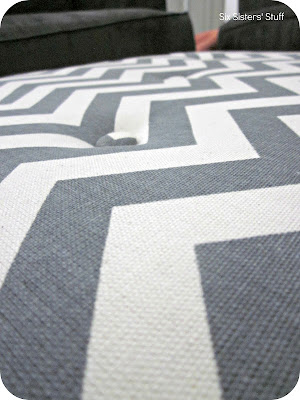
Once your buttons are secured, turn your ottoman over! The buttons make it look so much more finished. Love it!
You’re done! Put your feet up on your newly recovered ottoman and relax!









Makeup for Biochemists
x
I secured the buttons with a few small buttons on the backside, as shown in Step 7. Also, I purchased my fabric at Hobby Lobby. Thanks for your question!
I got it at Hobby Lobby!
here's the link if you want to take a peek. http://keepupwithusjones.blogspot.com/2012/09/my-first-attempt-at-upholstery.html