
A lot of people don’t think about ceiling when they think about remodeling. We have been working on updating our master bedroom and I felt like it needed a little something extra! I have been seeing so many different types of ceiling treatments and knew it was the perfect way to add some character to our master bedroom.
As soon as we decided to update our ceiling, I knew Armstrong Ceiling was the way to go! Their products are so user friendly that even amateurs, like ourselves, can install it!
Armstrong has a huge selection of ceiling treatments! It was so hard to pick just one with all of the gorgeous options available!
 Armstrong Ceiling can help transform the look of any room in your house!
This was how our master bedroom looked when we moved in…the previous owners left a few of their stuffed animals behind! Haha!

We painted the walls a really light gray and the ceiling and trim a bright white (sorry this is such bad lighting!), but it still didn’t look quite finished!
Once our Armstrong Ceiling arrived, we got right to work! Well, once the kids were asleep. 🙂 Sorry most of these pictures were taken at night when we could work without interruption!
Before you begin, bring your wood planks inside and let them sit in the room you’ll be installing them in for 24 hours so they can adjust to the conditions of the room.
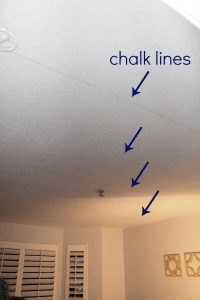
We took down the terrible, beige ceiling fan and smoke detector. Then we used a stud finder to locate the joists in the ceiling. We marked on both sides of the joists (to find the middle of each beam) on each side of the room and then ran a chalk line in the middle of those lines, as seen above.
We installed the planks directly to the existing ceiling joists using the WoodHaven clips that were included with our planks. We started by measuring the width of the room the same direction the joists were going. Then divide that number by 5″ (because the planks are 5″ wide). Multiply the remainder by 5″ and add 5″ to that result. Divide the result by 2 and that will give you the plank width for your border. Don’t worry, it sounds more confusing than it is! 😉
Cut the first border plank to the width you got from the equation above, removing the tongue edge. Align the groove edge of the border plank with the chalk line. Slide the clips into the groove at the joists and screw into your joists.
 (This picture explains it better than I do!)
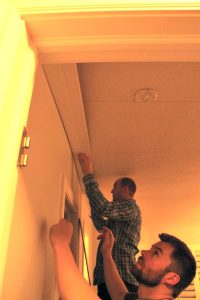 My wonderful husband and brother-in-law came to the rescue so my big, pregnant body didn’t have to climb up any ladders!
Continue measuring, cutting and installing the first row of planks. Cut the last plank so that there is a 1/2″ gap between the plank and the end of the wall. You will cover it up later with molding!
You’ll want the remaining planks to be staggered, so start the next row by cutting a bit of length from the first plank of the second row so the seams will be staggered. Start the second row by inserting the tongue into the groove of the piece in the first row.
All the seams from row to row should be staggered, so you can use the remaining piece of plank cut from the last plank of the prior row.
Measure and cut the width of the last row of planks 1/2″ short of the end wall. Install the last row of planks into the previous row and screw or nail into the joist, making sure it is close enough that molding will cover it.
 After all your planks are in place, install your crown molding. Fill in all the nail holes with spackle, sand them smooth and paint.
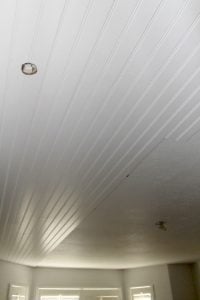
We installed a new ceiling fan and we were good to go! I feel like the ceiling was the perfect finishing touch for our master bedroom, and the WoodHaven Wood Beadboard Planks made it easy enough for us to do ourselves!
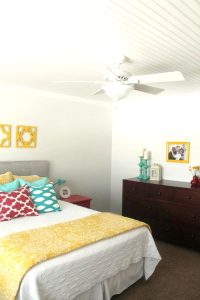
We absolutely love the bright, fresh look of our Armstrong Ceiling!
You can watch Armstrong’s video how to install their wood ceiling planks, HERE!
My sweet husband helped me out with a quick video with a few tips and tricks to help you install your Armstrong Ceiling:
If you are looking to transform the look of your home on a budget, check out Armstrong Ceiling!
Follow Armstrong Ceiling on Facebook, Twitter, YouTube, Pinterest and Google+ for amazing ideas and inspiration!
Disclosure: Armstrong Ceiling generously supplied ceiling planks for our home. All opinions are my own.









Questions & Reviews